Saturday, 19 February 2011

Catwalk Trends Research

RESEARCH... CATWALK TRENDS...
CHLOE... READY-TO-WEAR
PHEOBE PHILO AT CHLOE


I looked at this collection for insperation for my final design project.


BACKLESS BALLET STYLE


STIFF LEATHER


COTTON SHORTS WORN UNDER CHIFFON SKIRTS


REFRESHING & PRETTY


BANDAGE DRAPPED DRESSES


LEATHER BOXERS


SIMPLICITY


CLEAN & MINIMALIST


LEATHER & CHIFFON


DRAPED CUT OUT BODICE


NUDE LEATHER

Final Major Pattern Cutting

Final Major Project...PATTERN CUTTING..

I started pattern cutting for my final capsual collection. I started with the basic shorts block. I altered the block I removed the front and back pockets and took the zip out of the front. I changed the length of the legs and split the darts into panels. I cut out my pattern in calico and made my first toile. I did a fitting with my toile. It seemed very large so I took 2 cm out of each seem and panel except the front centre seem and crotch. I adjusted the front and back leg length and made the darts larger so the hotpants will become much more fitted around the waist and legs. I then adjusted my pattern from the toile taking measurements from the toile. I then made a second toile and did a fitting. The second toile fit nicely. I am ready to cut out in fabric and make the hotpants.


STARTING WITH THE BASIC BLOCK...


ADJUSTING THE PATTERN...


CUTTING OUT IN CALICO & MAKING THE TOILE


Saturday, 12 February 2011

Design Develpment

DESIGN DEVELOPMENT....  FINAL MAJOR PROJECT


INITIAL IDEAS...
SMALL PENCIL SKETCHES


THINKING ABOUT FABRICS...


ADDING COLOUR...


CHANGING THE COLOUR STORY?...
NO!!!


LINE UPS...


WHAT MEDIA WORKS BEST?...


FINAL LINE UPS...
WITH FABRICS


FLAT DRAWINGS...


PORTFOLIO WORK...

I have recently been doing alot of work for my portfolio, I have applyed for various universitys and am sending portfolio work to some of them the determine wether I get an interview with them.


I have been reworking and representing my work. I have do illustrations to go alongside some of the photos of the garments I have made. I have also shrank down alot of my research/mood boards and put them together to make one large board and added fabrics and samples.
PATTERN CUTTING.......


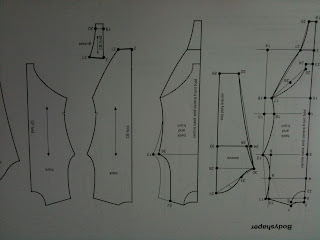
I decided to buy a pattern cutting book as I feel I need to push myself futher to do more pattern cutting and get a fuller understanding of it, I do already have substantial pattern cutting skills however my strengths lie in draping on the stand.


I looked at the pages on swimwear so I can apply these techniques when I come to start pattern cutting for my final collection.

FIRST FINAL MAJOR PROJECT IDEA


For my final major project I was asked to find a object to take insperation from for my final capsual collection, that represents myself or represents what could inspire me for the collection.  I chose this gemetric shape necklace, I felt very inspired looking at and ideas rushed straight to me.


I begain to put ideas down, I have never done swimwear before and felt confident to try it, I did some market research and looked at trends and found that the main silhouette for spring/summer 2011 are high waisted 50s style hotpants and swimsuits with various cut out areas. I initialy wanted to take the insperation from the necklace very literal and use the gemetric shapes as embellishment, I then went on to think about prints and stitching details.


I did alot of research into fabrics mainly lycra, I found some printed lycra with a unusual texture. I eventually decided to disgard this whole concept as I just didnt feel that I would be using the right fabrics and felt that this could let my final collection down. I may use this idea in the future.

DRESS MAKING PROCESS....

STEP ONE... PATTERN CUTTING..


I started by drafting my pattern, my design has one shoulder so I shaped the neckline going into the one strap. I also extended the darts for a more fitted look.


I cut out my pattern pieces for my bodice and pined them to a stand.  I had some issues with the shape of the neckline so i drafted the pattern again.


STEP TWO... THE TOILE..


I changed the shape of the back of my dress a number of times I used the stand to help my do this so I could play around with shape.  I then cut out my pattern in calico and made a toile of the bodice. After making the toile I pined it to the stand and used the dress making tape too map out where the neckline, back, and strap would go.  I then traced off the final pattern for my bodice.


I made the darts into panels and raised the waistline. I also adjusted the dart on the strap at the front so the fabric would be flat to the body.


STEP THREE... SKIRT PATTERN..


I drafted the skirt block and adjusted the darts so the skirt would have a more fitted look across the waist and hips.  The top top skirt pattern ends just below the knees I took 2cm of each side of the skirt pattern so the skirt is tighther around the knee area.


To make the flared part of the skirt I measured the bottom edge of the skirt panels and the made a circle skirt pattern using the measurements from the top panels of the skirt, I then split the full circle into seperate panels.


STEP FOUR... PUTTING IT TOGETHER..


I cut all my pattern pieces in my fabric and lining and begain to sew my dress together.


STEP FIVE... THE RUCHING..


For the ruching I used chiffon, I manipulated the fabric and used pins to secure different random points I hand stitched it all in place across the bodice panels.


I sewed all the lining into the bodice which was quite tricky in places because the chiffon made the bodice much more bulky. I attched the shoulder seems and then the skirt pieces together. I then attached the conceled zip and finaly pressed and steamed my dress.


THE FINAL GARMENT......

Sam Wright Photograpy